Audio setup
Choose the audio output device Ora DJ plays through, reserve master headroom for the limiter, and trade buffer size against controller latency.
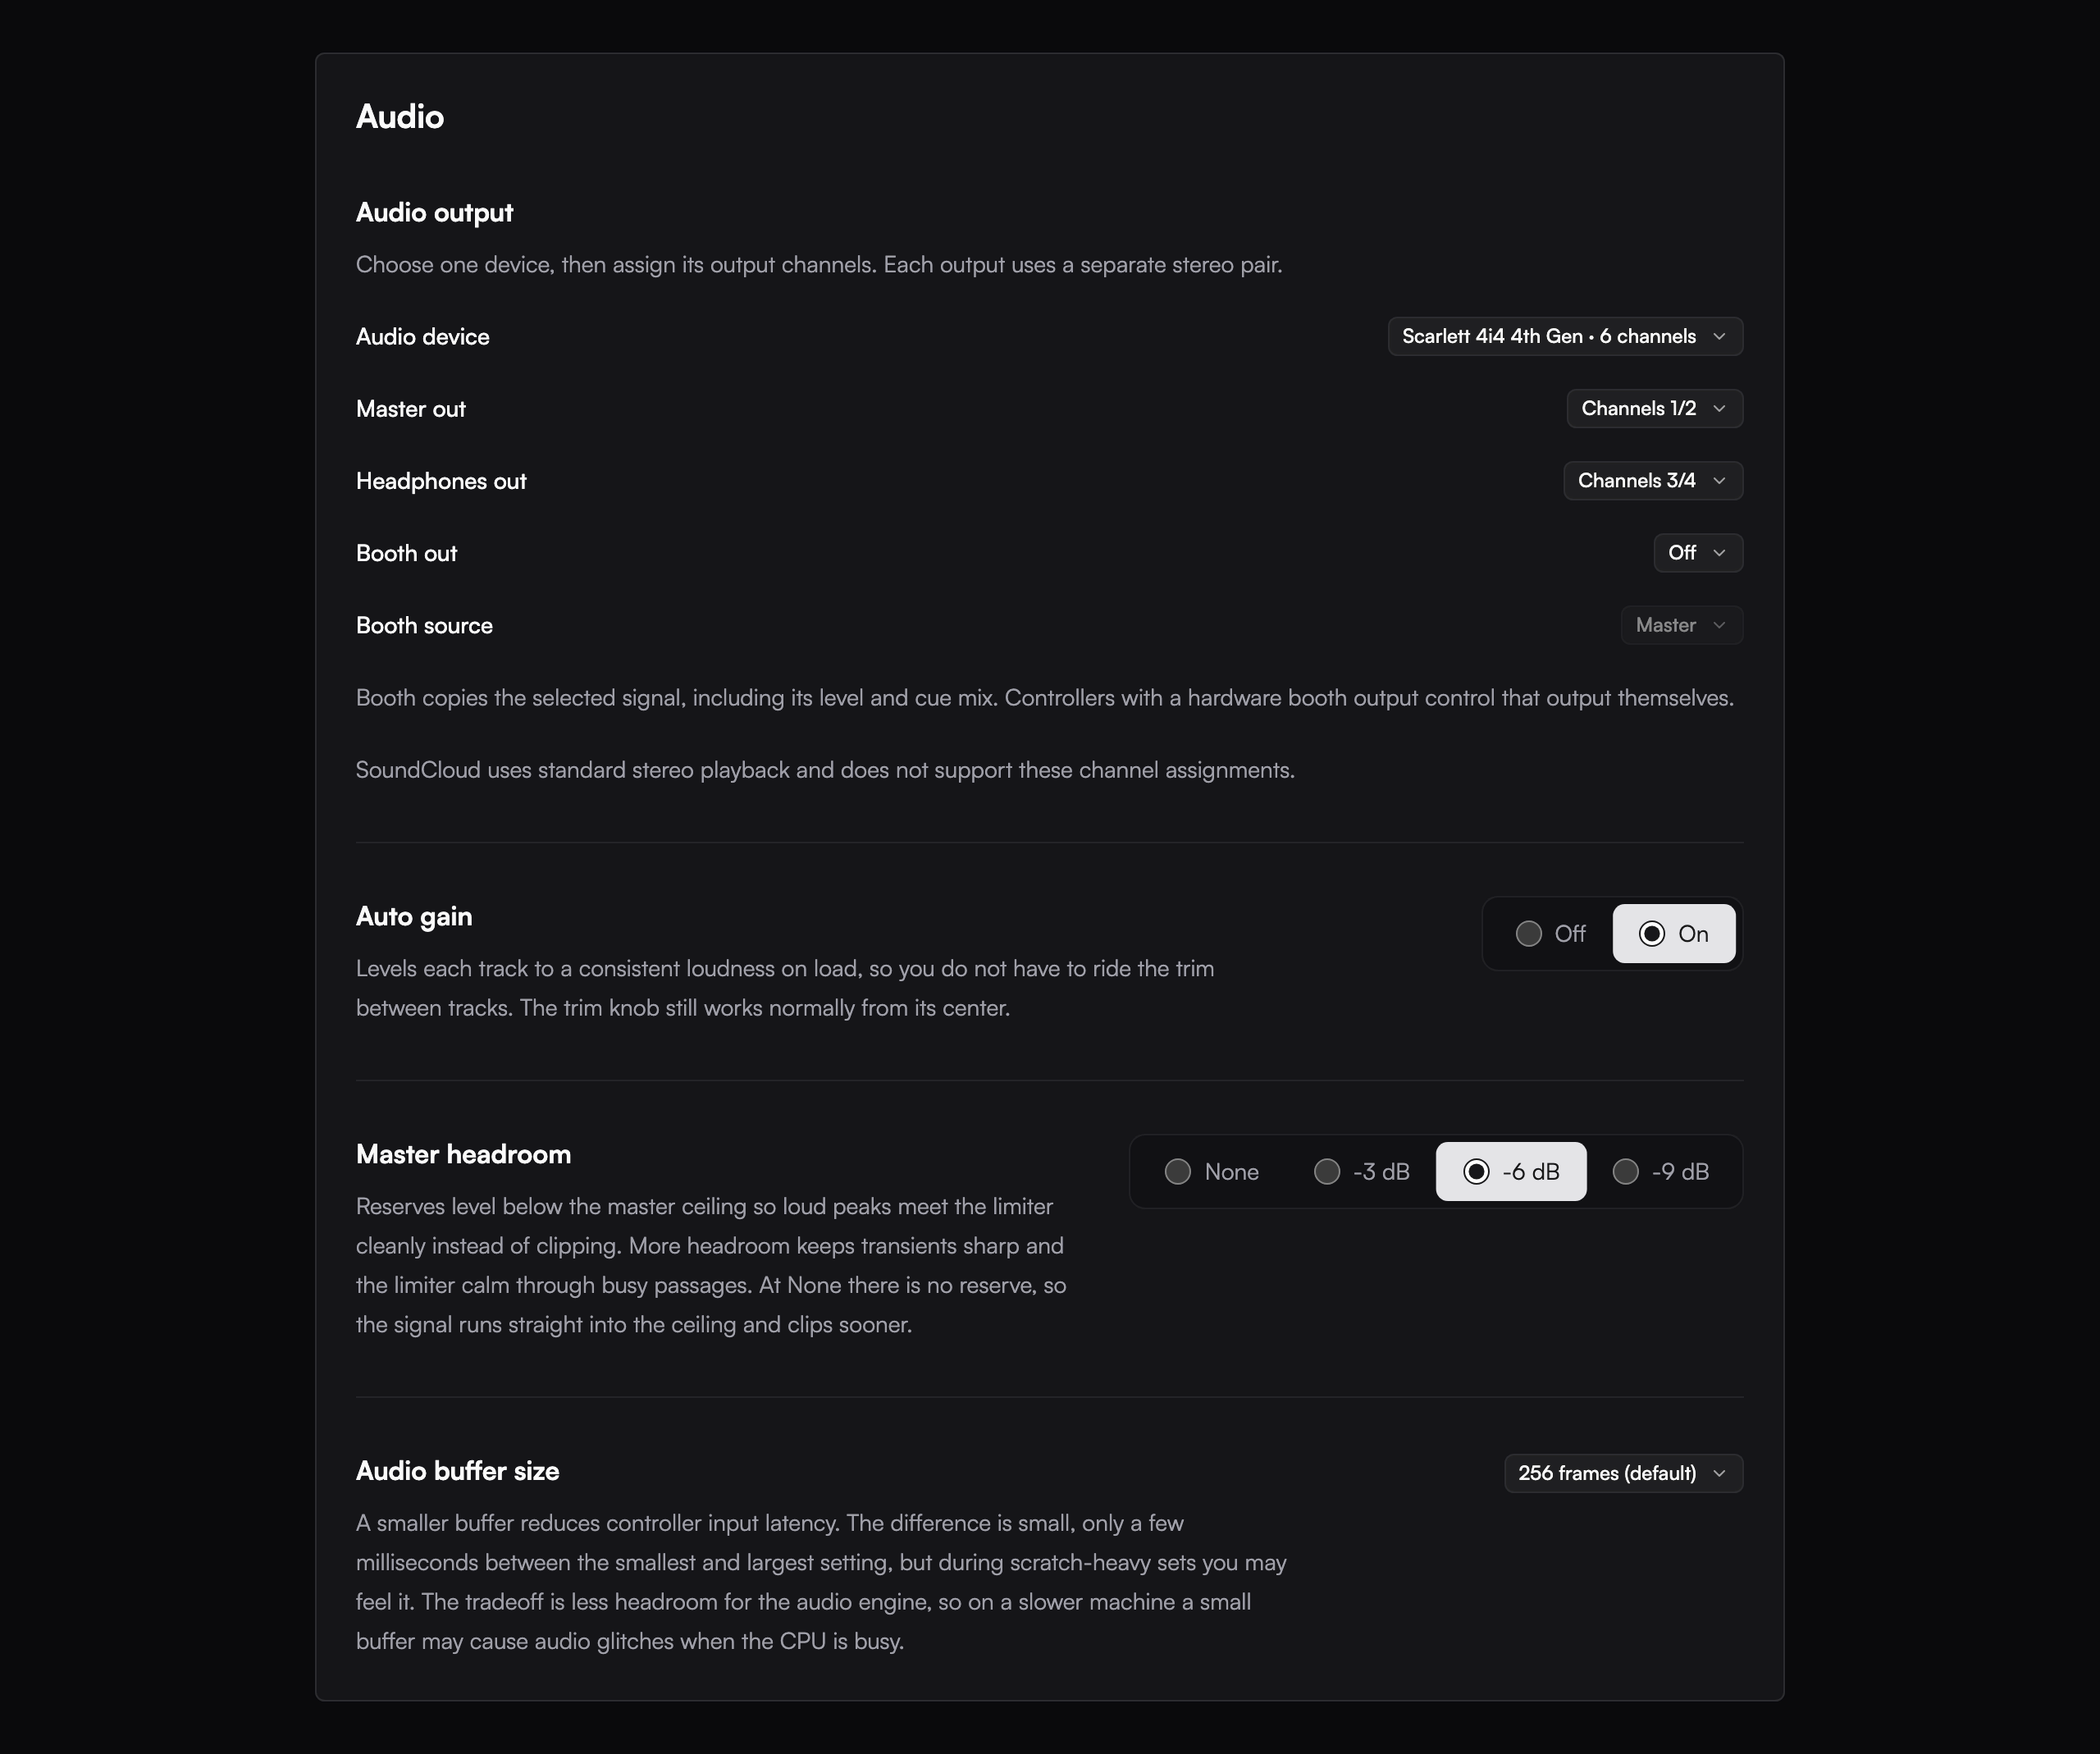
Open Settings > Audio to choose your device and output channels, auto gain, master headroom, and buffer size.
Choosing an output
The output device sits in the app header, showing a speaker or headphone icon and the current device's name. Click it and pick from Audio output. Devices with four or more channels are listed first and tagged 4-channel, since those are the ones that can carry a cue bus.
Ora DJ confirms the switch with a Routed to message. Hover the badge and it shows the device's output latency.
What Ora DJ picks at launch
In order:
- A DJ controller it recognizes by name, which always wins.
- The device you last chose yourself, if it's plugged in.
- Any device with four or more channels.
- Your Mac's built-in output.
Ora DJ only remembers a device you picked by hand. If that device isn't there next time, it quietly moves down the list and keeps your choice for the day it comes back.
Plugging in a controller Ora DJ knows overrides the device you picked. That's deliberate, since a connected controller is almost always the thing you want to hear through, but it will surprise you if you deliberately chose an interface.
If the device you're playing through disappears mid session, Ora DJ tells you the device was lost and falls back to your built-in output so the music keeps going.
Assign master, headphones and booth
In Settings > Audio, choose one Audio device, then assign its stereo pairs to Master out, Headphones out, and Booth out. Each output needs its own pair; a pair already assigned to another output is unavailable.
A stereo device can carry only the master. Separate master and headphone cue need at least four output channels. Adding a separate booth pair needs six. Headphones and booth can each be set to Off.
Choose Master or Headphones / Cue as the Booth source. Booth copies that signal, including its level and cue mix. A controller's own hardware booth output is controlled by the hardware itself.
TrackID's hosted SoundCloud player uses separate stereo playback and does not follow these DJ output assignments.
Auto gain
Auto gain is off by default. Turn it on in Settings > Audio to level each track to a consistent loudness when it loads. The trim knob still works normally from its center.
Master headroom
Open Settings > Audio and find Master headroom. Choose None, -3 dB, -6 dB, or -9 dB. The default is -3 dB.
Headroom reserves level under the master ceiling so loud peaks arrive at the limiter with room to work, instead of slamming into it. More headroom keeps transients sharp and the limiter calm through busy passages. At None there's no reserve and the signal clips sooner.
A brick wall limiter always sits at the very top, so the output never clips outright, whatever you set here.
Audio buffer size
In the same Audio settings, find Audio buffer size. The choices are 128 frames, 256 frames (default), and 512 frames.
A smaller buffer cuts the delay between moving a control and hearing it. The difference across the whole range is only a few milliseconds, but on a scratch heavy set you may feel it. The trade is headroom: a small buffer gives the audio engine less time to work, so on a slower machine it can glitch when the CPU is busy.
The buffer size is a request, not a guarantee. Some devices refuse a small buffer and open a larger one anyway.
Related
Syncing external hardware
See MIDI clock for hardware tempo, transport, and timing-offset controls.